Magento Commerce series
How to manage product reviews and ratings in Magento Commerce
Managing product reviews and ratings in Magento Commerce is an essential part of maintaining a high-quality shopping experience for your customers. Magento provides robust tools to enable, moderate, and display reviews and ratings on your product pages. Here’s a comprehensive guide on managing reviews and ratings in Magento Commerce:
Step 1: Access the Reviews and Ratings Section
- Log in to your Magento Admin Panel.
- Navigate to Marketing > User Content.
- You will find two options:
- Reviews
- Ratings
Step 2: Manage Product Reviews
1. View Pending and Approved Reviews
- Go to Marketing > User Content > Reviews.
- Use the filters to locate specific reviews by status (e.g., Pending, Approved, or Not Approved).
2. Approve or Disapprove Reviews
- Locate a pending review from the list.
- Click on the review to view its details, including:
- Product name.
- Reviewer name and email.
- Review content.
- To approve the review:
- Change the Status to Approved.
- Save the changes.
- To disapprove a review:
- Change the Status to Not Approved and save.
3. Edit or Delete Reviews
- Edit: You can update the review content or reviewer details if necessary.
- Delete: To remove a review, select it from the list and click Delete.
4. Add Admin-Submitted Reviews
- Magento allows admins to add reviews manually for products.
- Go to Marketing > User Content > Reviews > Add New Review.
- Fill in the product name, reviewer details, and review content.
- Set the status to Approved if you want it to appear immediately.
- How to build a website with WordPress and what are the best plugins to use: WordPress Web Design Tutorials: How to build a website with WordPress and what are the best plugins to use. Building a website with WordPress is an excellent choice due to its versatility, ease of use, and a vast array of plugins that enhance functionality. Here’s a comprehensive guide to building a WordPress website, along with recommendations for the best plugins.
- The Most Important Stages and Plugins for WordPress Website Development: Developing a WordPress website requires careful planning, execution, and optimisation to ensure it is functional, user-friendly, and effective. The process can be broken into key stages, and each stage benefits from specific plugins to enhance functionality and performance. Here’s a detailed guide to the most important stages of WordPress website development and the essential plugins for each stage.
- What are the most powerful Tools for SEO in WordPress?: Powerful SEO Tools for WordPress: Search Engine Optimisation (SEO) is essential for improving your WordPress website’s visibility in search engines. Here are the most powerful tools to optimise your site effectively:
- How to add shipping modules in CubeCart: Step 1: Log in to Your CubeCart Admin Panel: Open your web browser and navigate to your CubeCart admin login page. Enter your username and password to log in.
Step 2: Navigate to the Extensions Section: Once logged in, go to the left-hand menu and click on Manage Extensions. From the dropdown, select Extensions.
Step 3: Find Shipping Modules: In the Extensions section, locate the Shipping tab to view available shipping modules. You can browse through the list or use the search function to find a specific module. - Gathering domain and IP information with Whois and Dig: In the digital age, understanding the intricacies of domain and IP information is essential for anyone navigating the online landscape. This article explores two powerful tools—WHOIS and DIG—that help gather valuable insights about websites and their underlying infrastructure. Whether you’re a cybersecurity professional, a web developer, or simply curious about online resources, you will learn how to effectively utilize these tools, interpret their outputs, and apply this knowledge to real-world scenarios.
- What are the best WordPress Security plugins and how to set them up the best way: Read a comprehensive guide on the best WordPress security plugins and how to set them up to ensure optimal protection for your WordPress site.
- Will a headland provide enough shelter?
- Learn How To Purchase Your Own Domain Name with Fastdot.com: Open your web browser and go to Fastdot.com. Navigate to the Domains section, either from the homepage or from the main navigation bar.
Step 2: Search for Your Desired Domain Name: In the domain search bar, type the domain name you want to purchase. Fastdot supports a wide range of domain extensions (TLDs), such as .com, .net, .org, .com.au, and many others. Click the Search Domain button. The system will check the availability of your desired domain name.
Step 3: Manage Ratings
Ratings in Magento enable customers to rate products on specific criteria, such as quality, price, or value.
1. View Existing Ratings
- Navigate to Marketing > User Content > Ratings.
- Review the list of ratings available, including their names and visibility settings.
2. Create New Ratings
- Click Add New Rating.
- Configure the following:
- Default Rating Title: Name the rating, e.g., “Quality” or “Value for Money”.
- Visibility: Choose whether the rating is visible in the Admin Panel, Storefront, or both.
- Rating Options: Define rating levels, such as a 1–5 star system.
- Save the rating.
3. Edit or Delete Ratings
- Edit: Click on an existing rating to update its title, visibility, or options.
- Delete: Remove unwanted ratings by selecting them and clicking Delete.
Step 4: Configure Review and Rating Settings
To customise how reviews and ratings function on your site:
- Navigate to Stores > Configuration > Catalog > Catalog.
- Under the Product Reviews section, configure:
- Allow Guests to Write Reviews: Enable or disable reviews from users who are not logged in.
- Auto-Approval: Decide whether reviews require manual approval or are auto-published.
- Save your changes.
Step 5: Display Reviews and Ratings on Product Pages
Magento automatically displays approved reviews and ratings on product pages. Ensure your theme is configured to show them:
- Go to Content > Design > Configuration.
- Edit your store’s theme.
- Under Product Settings, verify that the “Product Reviews” section is enabled.
Step 6: Monitor and Engage with Customer Feedback
- Regularly review customer feedback to ensure all reviews are genuine and constructive.
- Respond to reviews (if your theme supports responses) to engage with customers and address concerns.
- Use positive reviews as testimonials in marketing campaigns.
Step 7: Best Practices for Reviews and Ratings
- Encourage Reviews:
- Send follow-up emails post-purchase, asking customers to leave reviews.
- Offer incentives like discounts for submitting reviews.
- Moderate Effectively:
- Approve reviews promptly to maintain an updated product page.
- Remove inappropriate or spammy reviews to maintain credibility.
- Analyse Feedback:
- Use reviews and ratings to identify product improvements and customer preferences.
- Address recurring complaints promptly to improve customer satisfaction.
- Optimise for SEO:
- Reviews and ratings contribute to user-generated content, boosting search engine visibility for your product pages.
By efficiently managing reviews and ratings, you can enhance customer trust, improve your store’s credibility, and drive conversions. Magento Commerce’s built-in tools make this process seamless and effective.
This tutorial will show you how to manage reviews and ratings in Magento Commerce, and assumes you’re already logged in to Magento
1) To manage product ratings, go to Catalog…
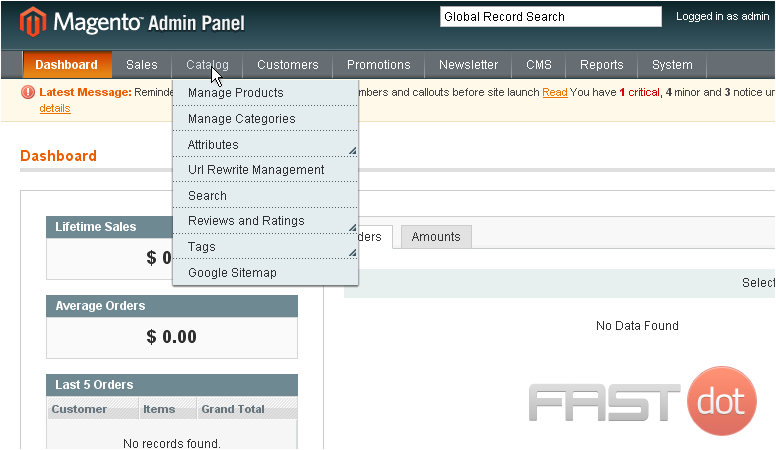
2) …then Reviews and Ratings… and click Manage Ratings
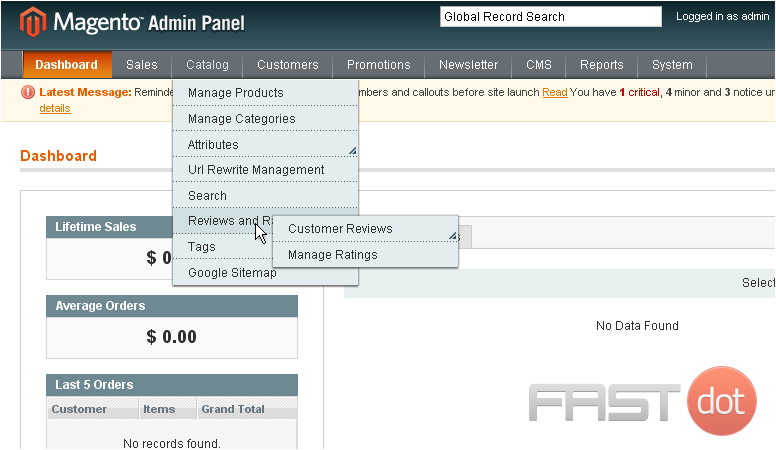
This is where you can view all of the ratings for products
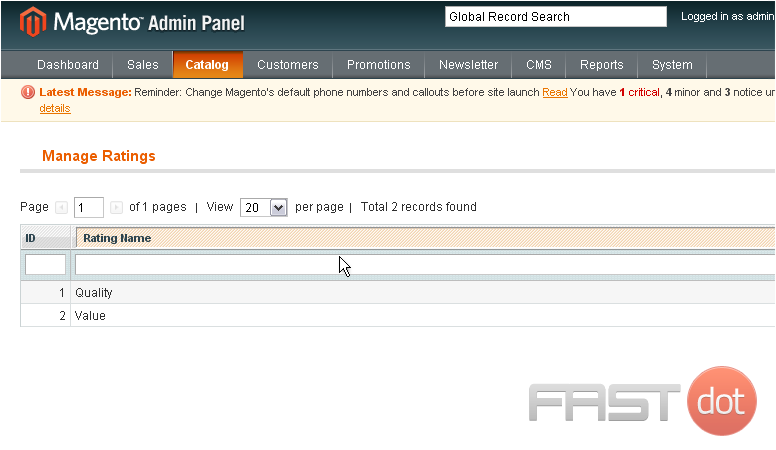
3) To add a new rating, click this button

4) Enter a title for the new rating
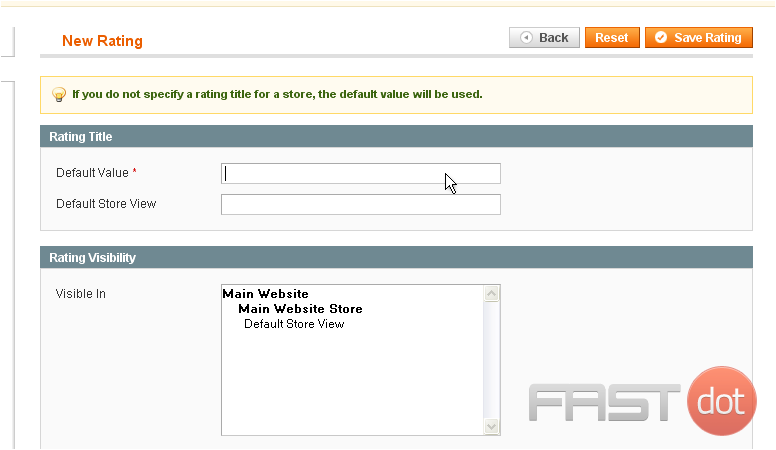
5) Select where you want the rating to be visible
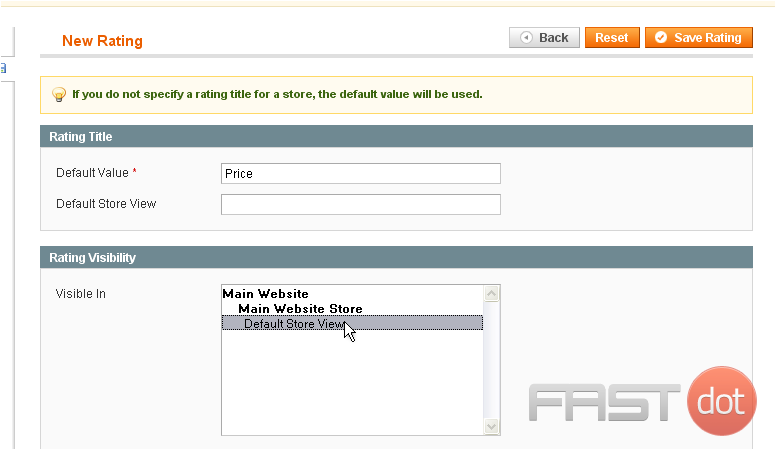
6) Click Save Rating
The rating has been saved
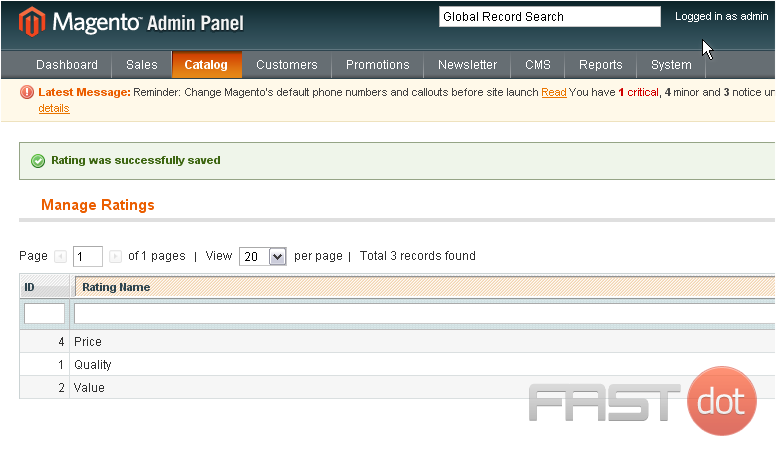
7) To manage customer reviews, go to Catalog…
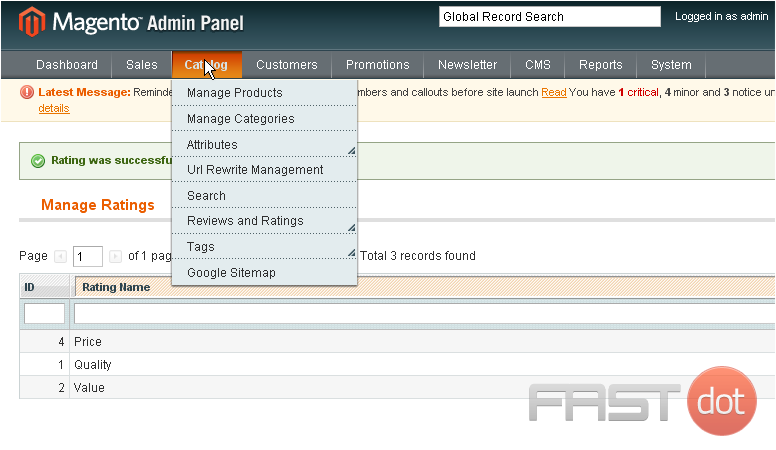
8) …then Reviews and Ratings…
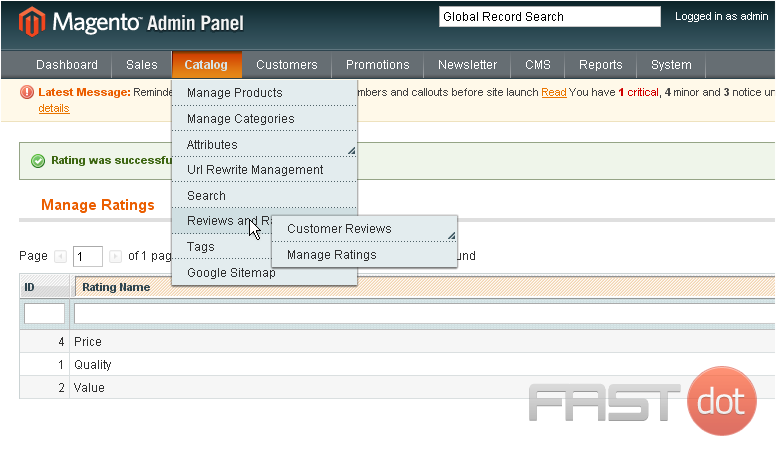
9) …Customer Reviews… and select Pending Reviews
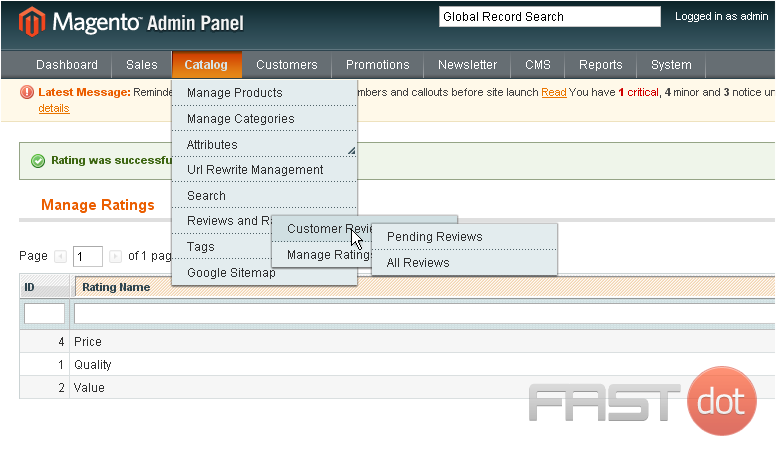
When a customer writes a review for a product, it will show up below until you approve it
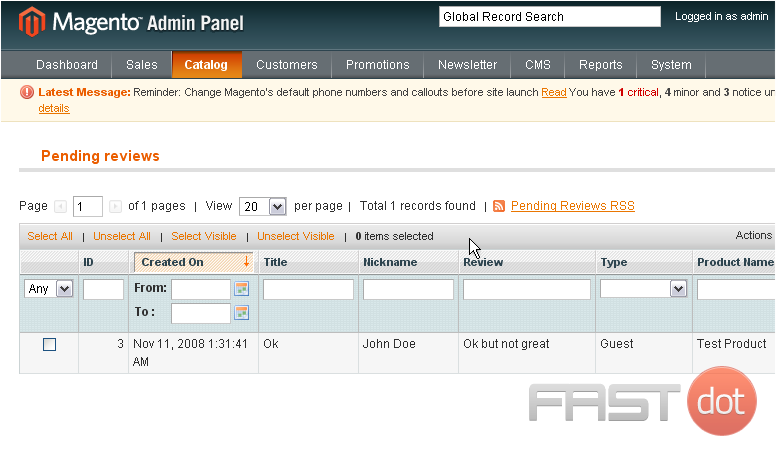
10) Click on the review to see more information
This page will show you the name of the product reviewed, who reviewed it, information about the rating, and details about the review
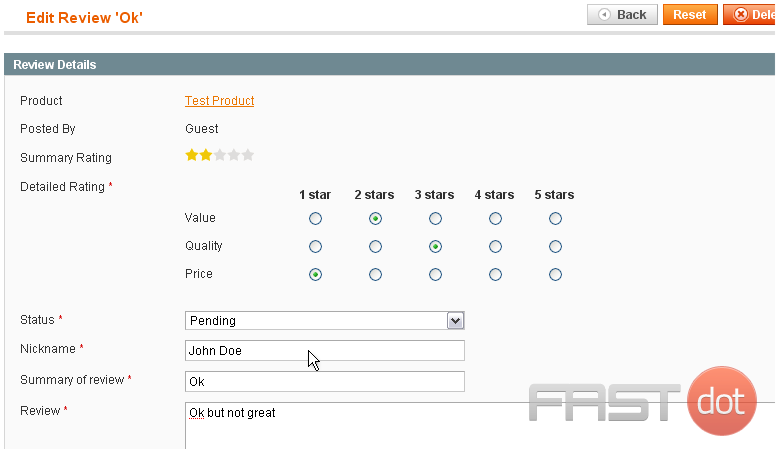
11) Approve a review by selecting the option from the menu
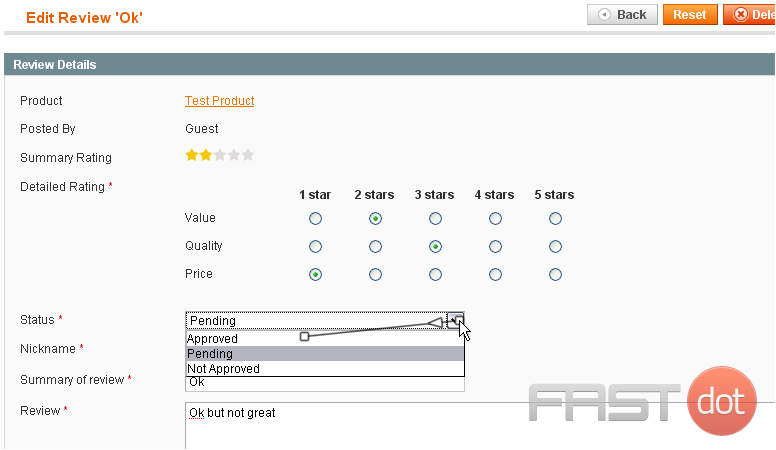
12) Click Save Review

The review has been saved and will now show up on the product page
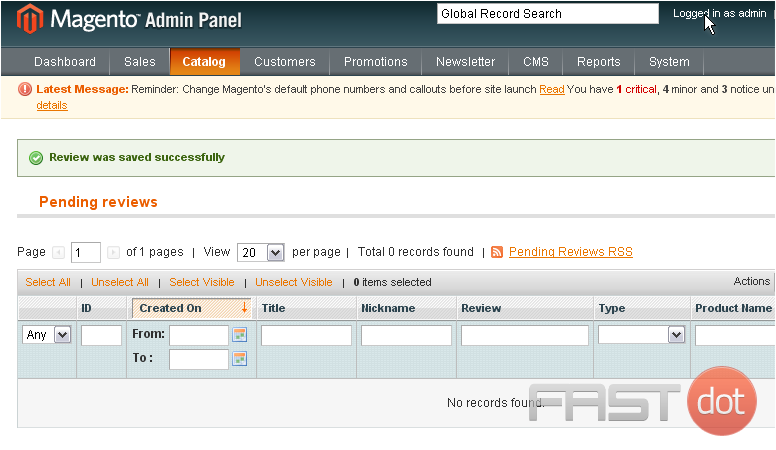
13) To view all customer reviews, go to Catalog…
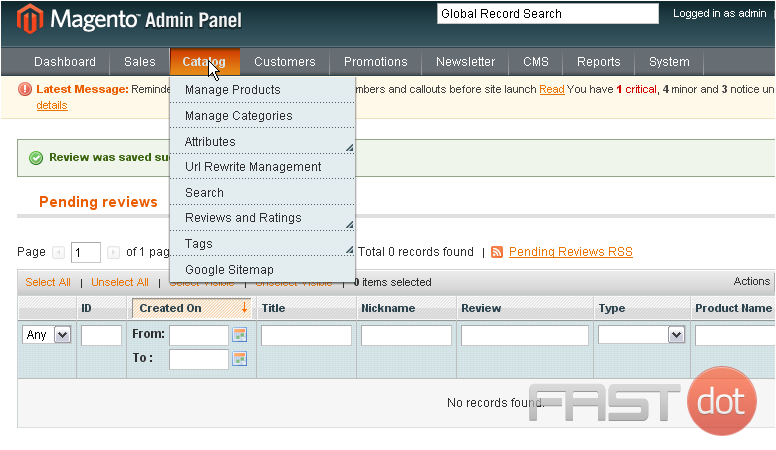
14) …Reviews and Ratings…
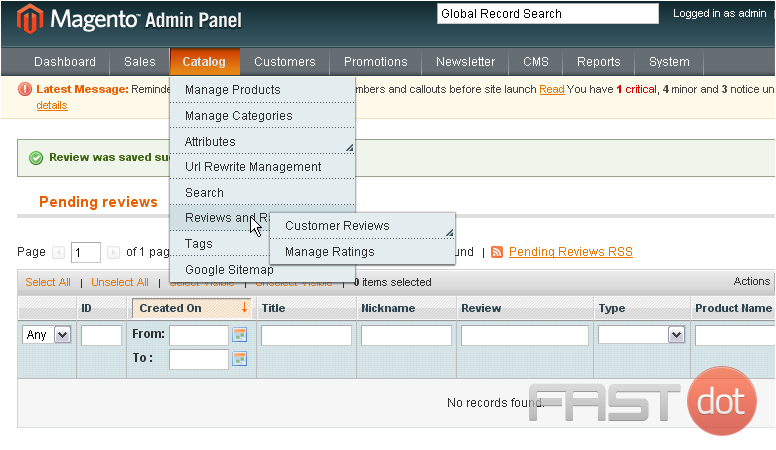
15) …Customer Reviews… and select All Reviews
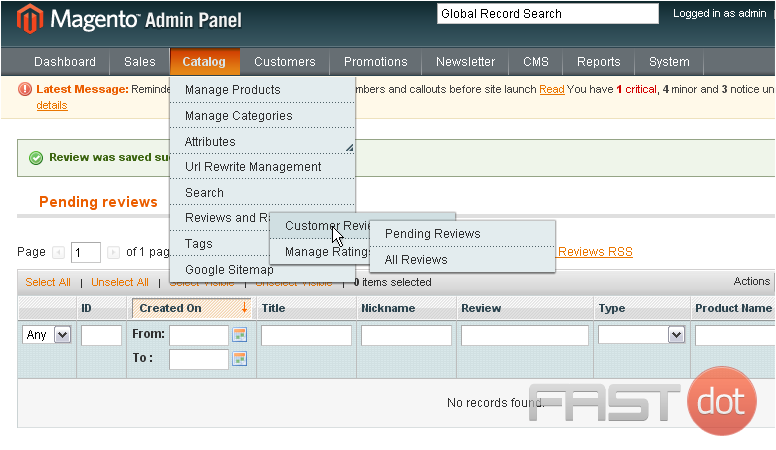
This page will show all customer reviews regardless of their status
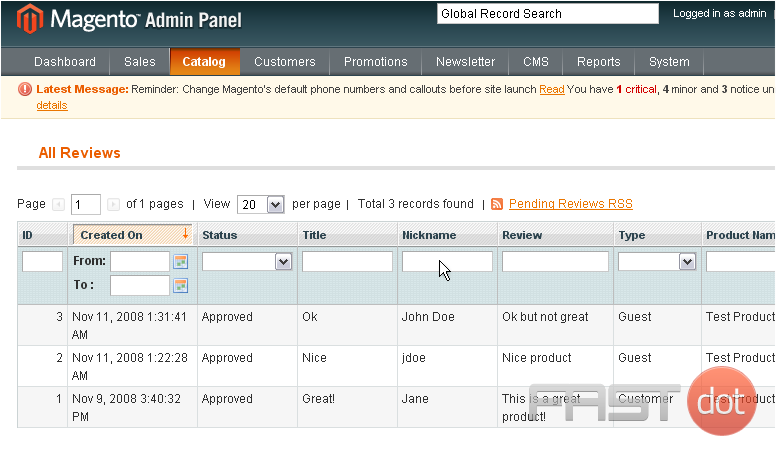
This is the end of the tutorial. You now know how to manage ratings and reviews in Magento Commerce


